I have done moderate amounts of mail art in the past, but recently it has become an art form. I have begun adding it to my snail mail more frequently because the recipients seem to enjoy it so much! I know I would 🙂 (I did another post on mail art using gel pens HERE).

(Supplies can be found at the bottom of this post. Many are affiliate links from which I may receive a small commission at no cost to you, Thank you for your support!)
I will be using Catherine Pooler’s Ink Pads. Just recently I posted them on my Social Media and I received so many questions on how I label my inks, that I am including a short blurb at the end of this post about it.
The piece we’re doing today is a masking technique with a little drawing and a little stamping, so let’s begin!
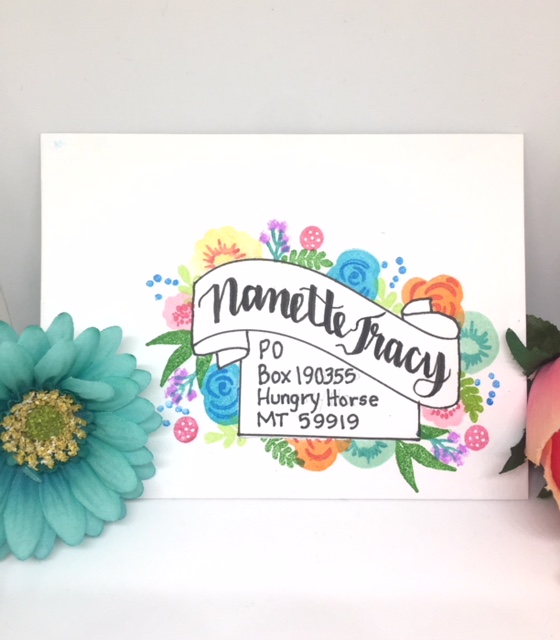
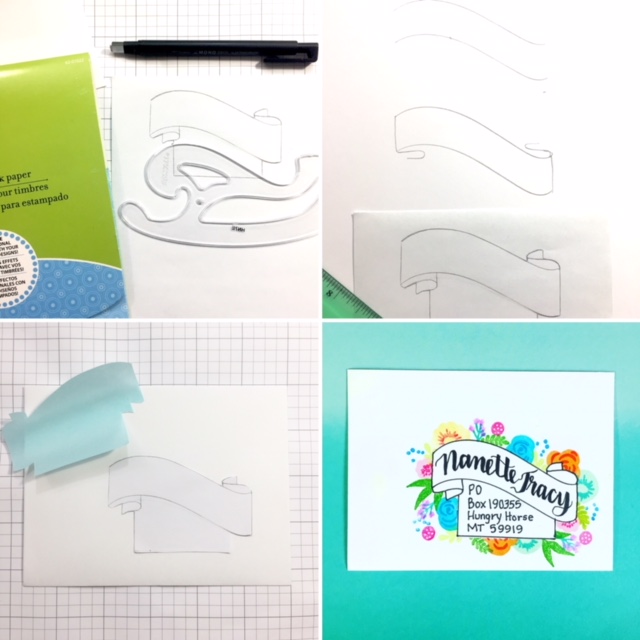
First I created a stencil on masking paper by Inkadinkado. I used a French Curve to draw the two arches of a banner on the stencil. Then I added a swirl on each side and closed in the banner with vertical lines. (See photo below). I attached, by drawing, an address box snuggled in under the banner.

I cut out the entire image and adhered the banner on my A2 envelope. The masking paper has a removable adhesive, so you can pull it right off! Be sure to save the backing, so you can re-use the stencil again.
I stamped a floral pattern with Catherine Pooler’s Tilly’s Magic Garden Stamp Set around the stencil. I removed the stencil and, using my French Curve and ruler, re-traced the banner and address box on the envelope with a pencil and then went over them again with a Staedtler Fineliner pen.
Then I wrote the name inside the banner with a Pilot Futayaku Double-Sided Brush Pen. (For this example, I used my own name and address) 🙂 I addressed the box with a Staedlter Fineliner.

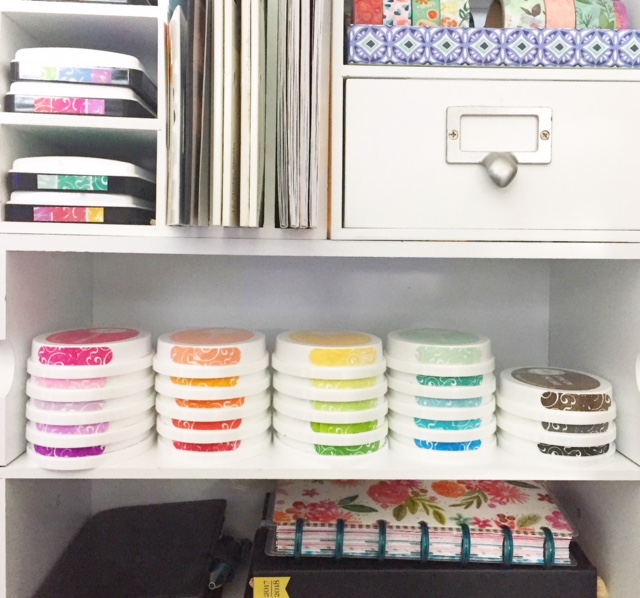
Catherine Pooler’s Ink Pads are my favorite and go-to inks to use. They are so vivid and beautiful! She just came out with a new series of colors to add to the collection, the Paradise Found Collection, which I believe Santa is bringing me for Christmas 🙂 In my excitement and anticipation, I decided to display and label them to be more easily identifiable and accessible.

I used a stamp from Simon Says Stamp Swatch Book Kit to stamp a single pattern on lightweight white cardstock. Then I used a Stampin’Up Word Window Punch to punch a label. This punch is no longer available through the company but can be found on eBay HERE. Also, I found the medium window from the EK Tools Photo Punch works just as well. Then I ran a couple labels at a time through a Xyron Sticker Maker. (I tried it on label paper first, but the color wasn’t true, so that’s why I went with the cardstock). You can place the label on the broad side or the short side, depending on how you store your inks. I have my labels placed on the short side.
And they are so pretty just to look at, too 🙂
Have a great day!
Nanette
Supplies
|